Check out the video of the installation and unveiling made by Weldon Byrns

Brian and Gail McCarthy commissioned Kathy Triplett and I to make a 10 by 20 foot mural outside of Odyssey Center for Ceramic Arts. These pictures are some of the process. The beginning is at the bottom, and the most recent images are at the top.
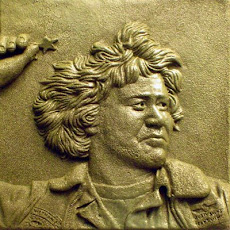
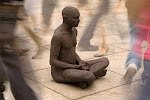
 The finished mural. (photo by Lawrence Irvine)

Meeting the deadline with a little help from my friends (from left to right): Kathy, Dustin Fowler, me, Bandit, Will Fortenbaugh. Not pictured, but many thanks to Drew, Mary Edson, Ron, Jon Graham, and all the staff, studio assistants and resident artists at Odyssey.
(photo by Frank Bott)

Beginning the grout on the far right.
(photo by Frank Bott)

Kathy Triplett in her element.
(photo by Frank Bott)

Kathy and I.
(photo by Frank Bott)

Our plaque, before grouting.

The yellow background tiles were placed free-hand--there was no predetermined order. We just made a whole bunch of odd shapes and fit them together randomly.
(photo by Frank Bott)


Beginning the installation. The blue water tiles are very dimensional (they stick out 6 inches from the wall), so were hung on masonry screws and then mortared to the wall. The screws can be seen in this photo with washers. (photo by Frank Bott)

Glazed water tiles laid out on the floor.
(photo by Frank Bott)

Done modeling. Letting it dry out before the terra sig is applied.

All cleaned up.


Eventually I laid the wall and the figure down horizontally so I could cut it up and make the slab walls on the sides of the grout joints. Also notice I changed the coffee mug.


Finishing the hand (thanks for the pics, Rachel).

My scaffolding system.

The figure is hollow slabs.

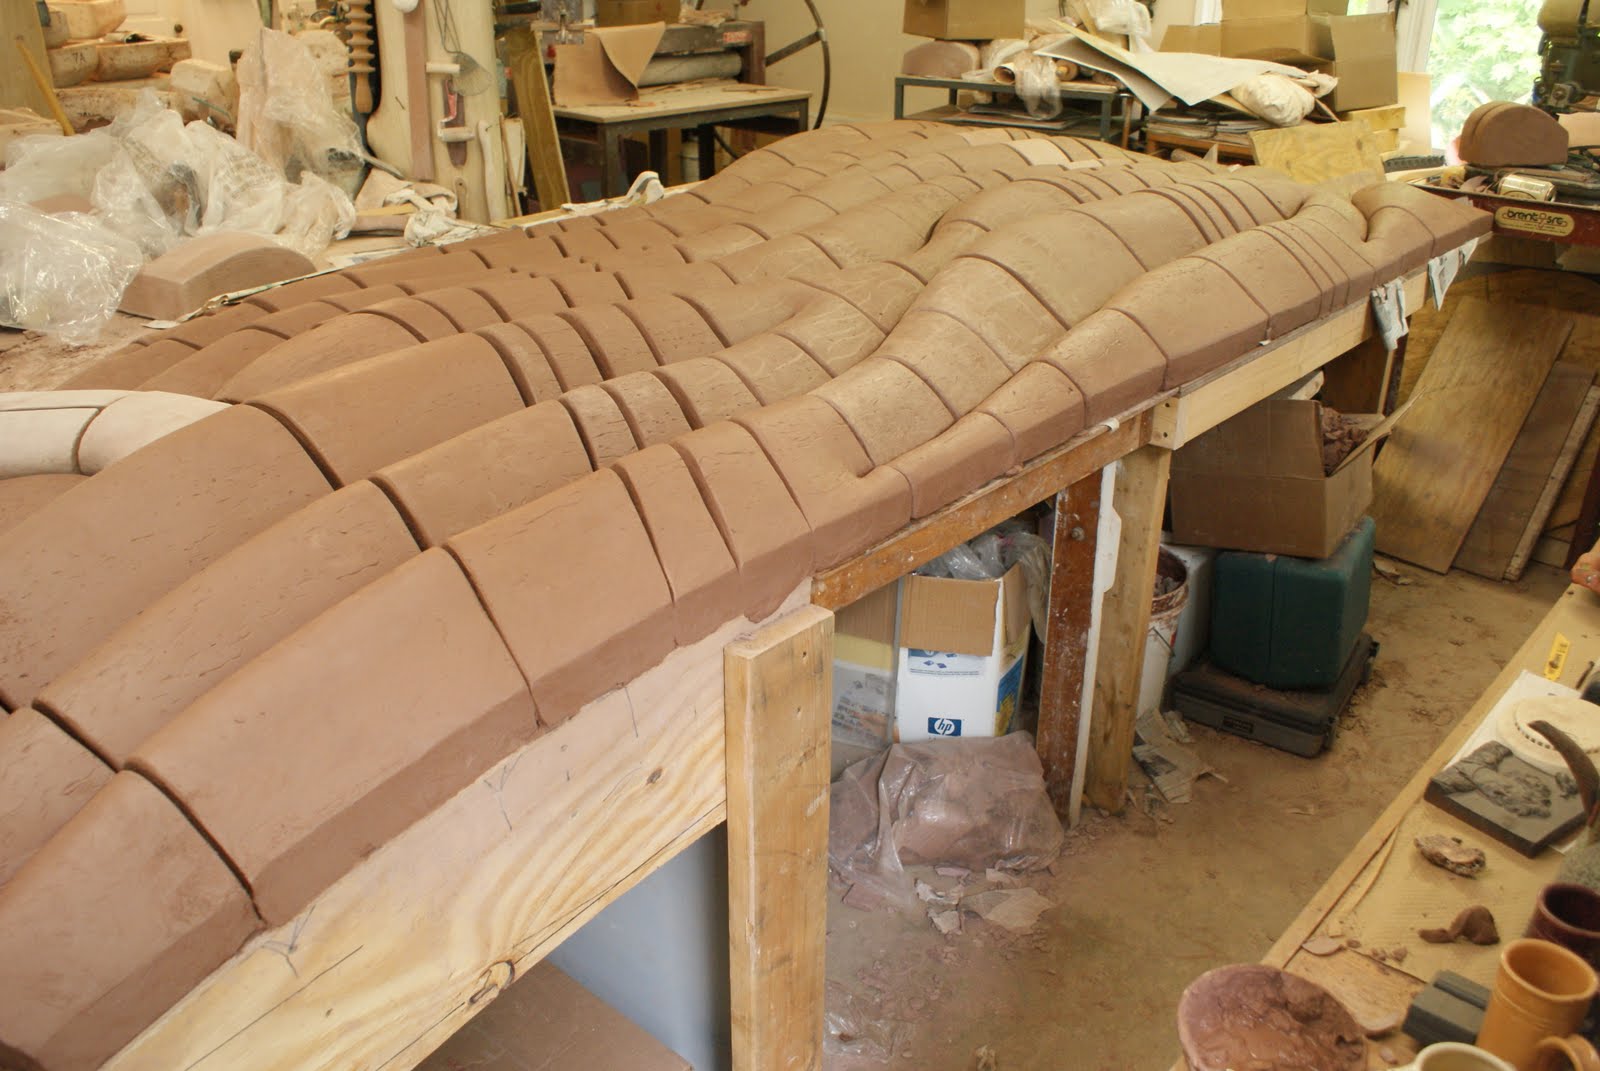
Making it 3-dimensional.

I was afraid the clay would fall off the wall since it was standing almost vertically, so these little plywood blocks were screwed down to hold it up. You can barely see the approximate grout joints traced into the clay.

Starting the figure.
The wall it will be installed on is curved, so I built a curved plywood wall so the back of the tiles are curved the same.

unfired water tiles.

arial view

the right edge
The bottom edge


We were dogsitting too. That's cassie standing by the wall the figure was modeled on. I turned it into a table so the tiles would make the curve of the wall

The top courses of tile on the left, full depth on the right.

The full depth of the mold was used for most of the tiles, but the top courses of tile taper into the wall, so the backs of the tiles were angled in the mold.

Pressing a slab of clay into the mold

Kathy's studio.
While Kathy was traveling the world, I got to housesit for her and work in her shop. Here's all the molds laid out.

The finished stack of 45 molds

Half way done molding! I actually really enjoy plaster mold-making.

Back to my photos... here is one of the more complicated cottle set-ups. Notice the clay on the cottle boards contours the sides of the tile to reduce the weight of the mold.

Cleaning the plaster and clay residue off with a sponge.

Cleaning the inside up with a loop tool.

Cleaning the edges of the top.

Pulling out the clay from the plaster mold.

Cleaning up the sides and edges with a surform.

Labeling the tile number so I can keep track of how it all goes together.

Smoothing out the bottom.

Frosting the top half of the mold.

Pouring plaster into the cottles.

Once all 54 tiles were sculpted I started making plaster molds of them. I combined some of the smaller tiles to bring the number of molds down to 43. Thanks again Frank for taking these great photos of making one of the molds. Here the cottle boards are clamped around one of the tiles. I inherited a glass countertop that works great for making molds on as the plaster and clay dont stick to it.

I moved the tiles around several times, rearranging the tessellation to make sure the lines were continuous.

A great Bott shot that captures the attention to the edges of the tiles.


Woah.. notice the first professional photograph? That's local photo journalist Frank Bott. He graciously offered to take some process photos and it's pretty obvious which ones he took. Here you can see my hands using their favorite Mudtool to sculpt the volume of the tiles (yeah I hooked up a link to mudtools.com cause I worked there over the summer and they gave me my favorite tool for free, thanks Kelly!).

The right-angle wire cutter I built to help make the solid-clay tiles.

The beginning of making the tiles 3-dimensional. Basically, I built up 6.5 inches of clay on the plywood. The wood acts like a wareboard, letting me move the pieces around without misshaping them. I knew how the clay should line up based on the edges of the plywood.

The 7 pieces of plywood cut into 54 pieces.

The 5 x 5 square foot tesserae cut into 7 pieces.

Cutting it out with a jigsaw.

Transferring to plywood.

Translating the design onto a 5 x 5 foot piece of paper.

The fractured tesserae.
You can get a sense of how it fits together.

Here the notched square is cut up and reassembled to make this tessellating shape.

The basic tessellating shape of the water: a square missing a notch.
It sets the pattern off a little to add complexity.

The wall, approximately 10 x 20 feet.
You can faintly see some chalk lines drawn of the water design.


3 comments:
I like it very much, Also I really enjoyed reading the post.
Alex, your job is wonderful, I haven't seen something like this before, it's great!
I’m not that much of a online reader to be honest but your sites really nice, keep it up! I'll go ahead and bookmark your website to come back down the road. Cheers
regrout bathroom
Post a Comment